Category

opencv

Gesture Control Unleashed: Building a Real-Time Gesture Recognition System for Smart Device Control ( with OpenCV)
Gesture Control Unleashed: Building a Real-Time Gesture Recognition System for Smart Device Control ( with OpenCV)

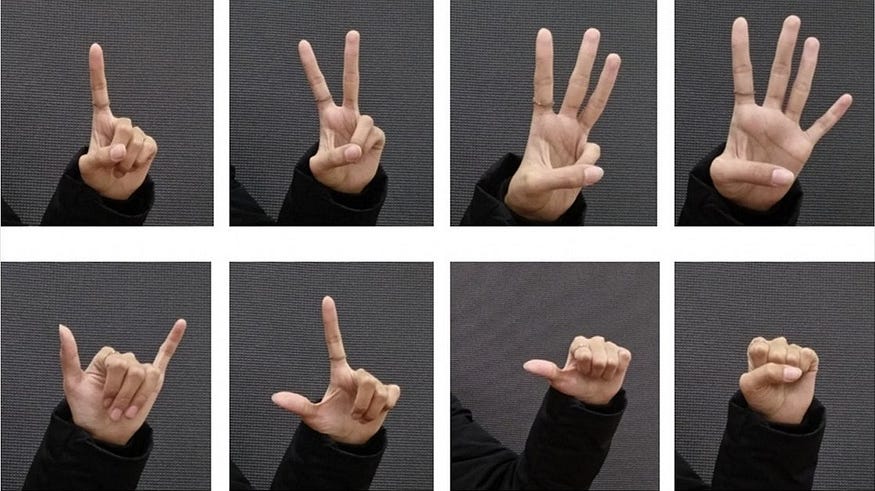
In this tutorial, we will explore how to build a real-time gesture recognition system using computer vision and deep learning algorithms. Our goal is to enable users to control smart devices through hand gestures captured by a camera. By the end of this tutorial, you will have a solid understanding of how to leverage Python and its libraries to implement gesture recognition and integrate it with smart devices.

Prerequisites: To follow along with this tutorial, you should have a basic understanding of Python programming and familiarity with computer vision and deep learning concepts. Additionally, you will need the following Python libraries installed: OpenCV, NumPy, and TensorFlow.

Step 1: Data Collection and Preprocessing

We need a dataset of hand gesture images to train our model. You can either collect your own dataset or use publicly available gesture recognition datasets. Once we have the dataset, we need to preprocess the images by resizing, normalizing, and converting them into a format suitable for model training.

Step 2: Building the Gesture Recognition Model

We will utilize deep learning techniques to build our gesture recognition model. One popular approach is to use a Convolutional Neural Network (CNN). We can leverage pre-trained CNN architectures, such as VGGNet or ResNet, and fine-tune them on our gesture dataset.

Here’s an example of building a simple CNN model using TensorFlow:

import tensorflow as tf
from tensorflow.keras import layers

# Build the CNN model
model = tf.keras.Sequential([
    layers.Conv2D(32, (3, 3), activation='relu', input_shape=(64, 64, 3)),
    layers.MaxPooling2D((2, 2)),
    layers.Flatten(),
    layers.Dense(64, activation='relu'),
    layers.Dense(num_classes, activation='softmax')
])
# Compile the model
model.compile(optimizer='adam',
              loss=tf.keras.losses.SparseCategoricalCrossentropy(),
              metrics=['accuracy'])
# Train the model
model.fit(train_images, train_labels, epochs=num_epochs, batch_size=batch_size)

Step 3: Real-Time Gesture Recognition

Once our model is trained, we can deploy it to perform real-time gesture recognition. We will utilize OpenCV to capture video frames from a camera, process them, and feed them into our trained model to predict the gesture being performed.

Here’s an example of real-time gesture recognition using OpenCV:

import cv2

# Load the trained model
model = tf.keras.models.load_model('gesture_model.h5')
# Open the video capture
cap = cv2.VideoCapture(0)
while True:
    ret, frame = cap.read()
    
    # Perform image preprocessing
    preprocessed_frame = preprocess_frame(frame)
    
    # Perform gesture prediction using the trained model
    prediction = model.predict(preprocessed_frame)
    predicted_gesture = get_predicted_gesture(prediction)
    
    # Display the predicted gesture on the frame
    cv2.putText(frame, predicted_gesture, (50, 50), cv2.FONT_HERSHEY_SIMPLEX, 1, (0, 255, 0), 2)
    
    # Display the frame
    cv2.imshow('Gesture Recognition', frame)
    
    # Exit on 'q' key press
    if cv2.waitKey(1) & 0xFF == ord('q'):
        break
# Release the video capture and close the windows
cap.release()
cv2.destroyAllWindows()

Step 4: Integrating with Smart Devices

Once we have the real-time gesture recognition working, we can integrate it with smart devices. For example, we can establish a connection with IoT devices or home automation systems to control lights, switches, and other smart devices based on recognized gestures. This integration typically involves utilizing appropriate APIs or protocols to send control signals to the smart devices based on the recognized gestures.

Step 5: Adding Gesture Commands

To make the system more versatile, we can associate specific gestures with predefined commands. For example, a swipe gesture to the right can be associated with turning on the lights, while a swipe gesture to the left can be associated with turning them off. By mapping gestures to specific commands, we can create a more intuitive and interactive user experience.

Step 6: Enhancements and Customizations

To further improve the gesture recognition system, you can experiment with various techniques and enhancements. This may include exploring different deep learning architectures, optimizing model performance, adding data augmentation techniques, or fine-tuning the system based on user feedback. Additionally, you can customize the gestures and commands based on specific user preferences or device functionalities.

In this tutorial, we explored how to build a real-time gesture recognition system using computer vision and deep learning algorithms in Python. We covered data collection and preprocessing, building a gesture recognition model using a CNN, performing real-time recognition with OpenCV, and integrating the system with smart devices. By following these steps, you can create an interactive and hands-free control system for various smart devices based on recognized hand gestures.

Reconocimiento de las emociones humanas con IA. (TensorFlow, Keras, OpenCV) (en español)

Reconocimiento de las emociones humanas con IA. (TensorFlow, Keras, OpenCV) (en español)

La detección de emociones es una tarea de aprendizaje automático que consiste en detectar y clasificar las emociones expresadas por los humanos a través del habla, las expresiones faciales y otras formas de comunicación no verbal. La detección de emociones tiene aplicaciones en campos como la psicología, el marketing y la interacción hombre-computadora. En este tutorial, exploraremos cómo construir un sistema de detección de emociones utilizando Python y aprendizaje automático.

Paso 1: Instalación de las bibliotecas requeridas

El primer paso es instalar las bibliotecas requeridas. Utilizaremos las bibliotecas TensorFlow y Keras para el aprendizaje automático, así como OpenCV para la visión por computadora.

Paso 2: Preprocesamiento de datos

El siguiente paso es preprocesar los datos. Utilizaremos un conjunto de datos de imágenes faciales con emociones correspondientes para entrenar el sistema de detección de emociones. Utilizaremos OpenCV para cargar y preprocesar las imágenes.

Paso 3: Creación de datos de entrenamiento

A continuación, necesitamos crear los datos de entrenamiento para el sistema de detección de emociones. Utilizaremos una técnica llamada transfer learning, que implica utilizar un modelo pre-entrenado como punto de partida para entrenar nuestro propio modelo.

Paso 4: Entrenamiento del modelo

Ahora, podemos entrenar el modelo utilizando los datos de entrenamiento que creamos anteriormente.

Paso 5: Prueba del modelo

Finalmente, podemos probar el modelo proporcionándole una nueva imagen y teniendo el modelo predecir la emoción correspondiente.

En este tutorial, exploramos cómo construir un sistema de detección de emociones utilizando Python y aprendizaje automático. Utilizamos OpenCV para el preprocesamiento de imágenes, TensorFlow y Keras para el aprendizaje automático y transfer learning para crear un modelo que pueda reconocer emociones expresadas en imágenes faciales. La detección de emociones tiene una amplia gama de aplicaciones, incluyendo mejorar el servicio al cliente, mejorar la interacción humano-computadora y ayudar a las personas a comprender y gestionar mejor sus emociones. Al utilizar el aprendizaje automático, podemos construir sistemas de detección de emociones más precisos y efectivos que se pueden aplicar en una variedad de contextos.

Una limitación de este tutorial es que nos enfocamos solo en la detección de emociones faciales y no en otras modalidades como el habla o el texto. Sin embargo, las técnicas utilizadas aquí también se pueden aplicar a otras formas de detección de emociones.

En conclusión, la construcción de un sistema de detección de emociones puede ser un proyecto gratificante para cualquier persona interesada en el aprendizaje automático y sus aplicaciones en la psicología y el comportamiento humano. Siguiendo los pasos de este tutorial, puede crear su propio sistema de detección de emociones y explorar las posibilidades de este emocionante campo.

Recognizing human emotions with AI. (TensorFlow, Keras, OpenCV)

Recognizing human emotions with AI. (TensorFlow, Keras, OpenCV)

Emotion recognition is a machine learning task that involves detecting and classifying emotions expressed by humans through speech, facial expressions, and other forms of non-verbal communication. Emotion recognition has applications in fields such as psychology, marketing, and human-computer interaction. In this tutorial, we will explore how to build an emotion recognition system using Python and machine learning.

Step 1: Installing the required libraries

The first step is to install the required libraries. We will be using the TensorFlow and Keras libraries for machine learning, as well as OpenCV for computer vision.

pip install tensorflow keras opencv-python-headless

Step 2: Preprocessing the data

The next step is to preprocess the data. We will be using a dataset of facial images with corresponding emotions for training the emotion recognition system. We will use OpenCV to load and preprocess the images.

import cv2
import numpy as np
import pandas as pd

# Load the data
data = pd.read_csv('emotion_labels.csv')
# Load the images
images = []
for image_path in data['image_path']:
    image = cv2.imread(image_path, 0)
    image = cv2.resize(image, (48, 48))
    images.append(image)
# Convert the images to numpy arrays
images = np.array(images)

Step 3: Creating training data

Next, we need to create the training data for the emotion recognition system. We will use a technique called transfer learning, which involves using a pre-trained model as a starting point for training our own model.

from keras.applications import VGG16
from keras.models import Model
from keras.layers import Dense, Flatten

# Load the pre-trained model
base_model = VGG16(weights='imagenet', include_top=False, input_shape=(48, 48, 3))
# Add new layers to the model
x = base_model.output
x = Flatten()(x)
x = Dense(1024, activation='relu')(x)
predictions = Dense(7, activation='softmax')(x)
# Define the new model
model = Model(inputs=base_model.input, outputs=predictions)
# Freeze the layers in the pre-trained model
for layer in base_model.layers:
    layer.trainable = False
# Compile the model
model.compile(loss='categorical_crossentropy', optimizer='adam', metrics=['accuracy'])

Step 4: Training the model

Now, we can train the model using the training data we created earlier.

from keras.utils import to_categorical

# Convert the labels to one-hot encoding
labels = to_categorical(data['label'], num_classes=7)
# Train the model
model.fit(images, labels, epochs=10, batch_size=32)

Step 5: Testing the model

Finally, we can test the model by providing it with a new image and having it predict the corresponding emotion.

# Load a test image
test_image = cv2.imread('test_image.jpg', 0)
test_image = cv2.resize(test_image, (48, 48))
# Convert the test image to a numpy array
test_image = np.array([test_image])# Predict the emotion in the test image
prediction = model.predict(test_image)[0]
emotion = np.argmax(prediction)# Print the predicted emotion
emotions = ['Angry', 'Disgust', 'Fear', 'Happy', 'Neutral', 'Sad', 'Surprise']
print('Predicted emotion:', emotions[emotion])

In this tutorial, we explored how to build an emotion recognition system using Python and machine learning. We used OpenCV for image preprocessing, TensorFlow and Keras for machine learning modeling, and transfer learning to create a model that can recognize emotions expressed in facial images. Emotion recognition has a wide range of applications, including improving customer service, enhancing human-computer interaction, and helping individuals better understand and manage their emotions. By using machine learning, we can build more accurate and effective emotion recognition systems that can be applied in a variety of contexts.

One limitation of this tutorial is that we only focused on facial image recognition, and not other modalities such as speech or text. However, the techniques used here can be applied to other forms of emotion recognition as well.

In conclusion, building an emotion recognition system can be a rewarding project for anyone interested in machine learning and its applications in human psychology and behavior. By following the steps in this tutorial, you can create your own emotion recognition system and explore the possibilities of this exciting field.