Gesture Control Unleashed: Building a Real-Time Gesture Recognition System for Smart Device Control ( with OpenCV)

In this tutorial, we will explore how to build a real-time gesture recognition system using computer vision and deep learning algorithms. Our goal is to enable users to control smart devices through hand gestures captured by a camera. By the end of this tutorial, you will have a solid understanding of how to leverage Python and its libraries to implement gesture recognition and integrate it with smart devices.
Prerequisites: To follow along with this tutorial, you should have a basic understanding of Python programming and familiarity with computer vision and deep learning concepts. Additionally, you will need the following Python libraries installed: OpenCV, NumPy, and TensorFlow.
Step 1: Data Collection and Preprocessing
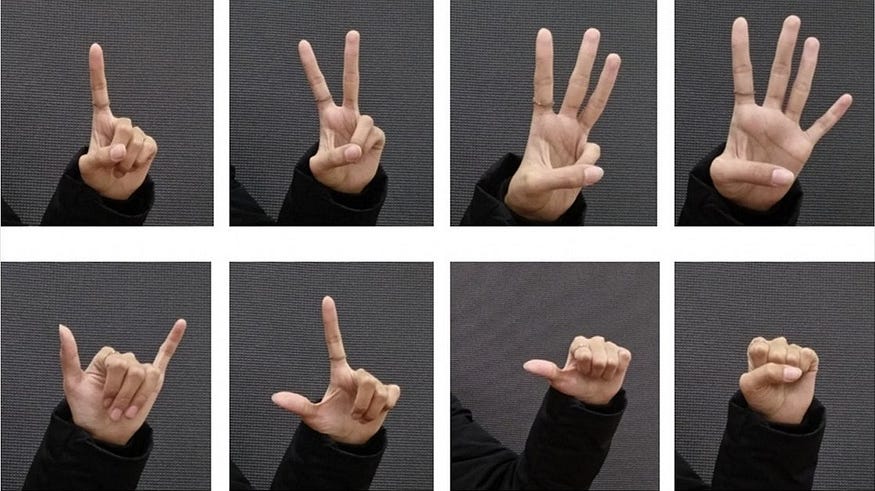
We need a dataset of hand gesture images to train our model. You can either collect your own dataset or use publicly available gesture recognition datasets. Once we have the dataset, we need to preprocess the images by resizing, normalizing, and converting them into a format suitable for model training.
Step 2: Building the Gesture Recognition Model
We will utilize deep learning techniques to build our gesture recognition model. One popular approach is to use a Convolutional Neural Network (CNN). We can leverage pre-trained CNN architectures, such as VGGNet or ResNet, and fine-tune them on our gesture dataset.
Here’s an example of building a simple CNN model using TensorFlow:
import tensorflow as tf
from tensorflow.keras import layers

# Build the CNN model
model = tf.keras.Sequential([
    layers.Conv2D(32, (3, 3), activation='relu', input_shape=(64, 64, 3)),
    layers.MaxPooling2D((2, 2)),
    layers.Flatten(),
    layers.Dense(64, activation='relu'),
    layers.Dense(num_classes, activation='softmax')
])
# Compile the model
model.compile(optimizer='adam',
              loss=tf.keras.losses.SparseCategoricalCrossentropy(),
              metrics=['accuracy'])
# Train the model
model.fit(train_images, train_labels, epochs=num_epochs, batch_size=batch_size)
Step 3: Real-Time Gesture Recognition
Once our model is trained, we can deploy it to perform real-time gesture recognition. We will utilize OpenCV to capture video frames from a camera, process them, and feed them into our trained model to predict the gesture being performed.
Here’s an example of real-time gesture recognition using OpenCV:
import cv2

# Load the trained model
model = tf.keras.models.load_model('gesture_model.h5')
# Open the video capture
cap = cv2.VideoCapture(0)
while True:
    ret, frame = cap.read()

    # Perform image preprocessing
    preprocessed_frame = preprocess_frame(frame)

    # Perform gesture prediction using the trained model
    prediction = model.predict(preprocessed_frame)
    predicted_gesture = get_predicted_gesture(prediction)

    # Display the predicted gesture on the frame
    cv2.putText(frame, predicted_gesture, (50, 50), cv2.FONT_HERSHEY_SIMPLEX, 1, (0, 255, 0), 2)

    # Display the frame
    cv2.imshow('Gesture Recognition', frame)

    # Exit on 'q' key press
    if cv2.waitKey(1) & 0xFF == ord('q'):
        break
# Release the video capture and close the windows
cap.release()
cv2.destroyAllWindows()
Step 4: Integrating with Smart Devices
Once we have the real-time gesture recognition working, we can integrate it with smart devices. For example, we can establish a connection with IoT devices or home automation systems to control lights, switches, and other smart devices based on recognized gestures. This integration typically involves utilizing appropriate APIs or protocols to send control signals to the smart devices based on the recognized gestures.
Step 5: Adding Gesture Commands
To make the system more versatile, we can associate specific gestures with predefined commands. For example, a swipe gesture to the right can be associated with turning on the lights, while a swipe gesture to the left can be associated with turning them off. By mapping gestures to specific commands, we can create a more intuitive and interactive user experience.
Step 6: Enhancements and Customizations
To further improve the gesture recognition system, you can experiment with various techniques and enhancements. This may include exploring different deep learning architectures, optimizing model performance, adding data augmentation techniques, or fine-tuning the system based on user feedback. Additionally, you can customize the gestures and commands based on specific user preferences or device functionalities.
In this tutorial, we explored how to build a real-time gesture recognition system using computer vision and deep learning algorithms in Python. We covered data collection and preprocessing, building a gesture recognition model using a CNN, performing real-time recognition with OpenCV, and integrating the system with smart devices. By following these steps, you can create an interactive and hands-free control system for various smart devices based on recognized hand gestures.
Lyron Foster is a Hawai’i based African American Author, Musician, Actor, Blogger, Philanthropist and Multinational Serial Tech Entrepreneur.

