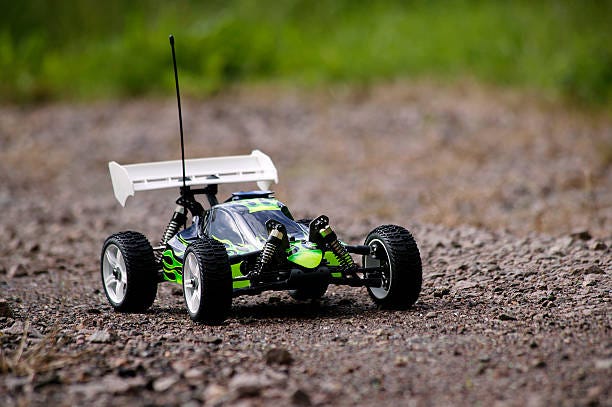
Part 1: Turning an RC Car into an Autonomous Vehicle (1/5)

Autonomous vehicles, also known as self-driving cars, have become increasingly popular in recent years due to their potential to improve transportation efficiency and reduce accidents. In this tutorial, we will explore how to build an autonomous vehicle from an RC car using a Raspberry Pi or Arduino for processing. We will use Python to program the vehicle’s behavior, and we will integrate sensors such as ultrasonic sensors and a camera to enable obstacle detection, object recognition, and behavior monitoring.
Step 1: Setting up the Hardware
The first step is to set up the hardware components of the autonomous vehicle. We will need an RC car, a Raspberry Pi or Arduino for processing, and sensors such as ultrasonic sensors and a camera. We will use the GPIO pins on the Raspberry Pi or Arduino to interface with the sensors and control the vehicle’s motors.
To set up the hardware, we will need to disassemble the RC car and remove the existing control circuitry. We will then connect the motor drivers and sensors to the Raspberry Pi or Arduino using jumper wires. We will also need to mount the camera on the vehicle and connect it to the Raspberry Pi or Arduino.
Step 2: Setting up the Software Environment
Once the hardware is set up, we need to set up the software environment. We will use the Raspbian or Arduino IDE to program the Raspberry Pi or Arduino. We will also need to install the necessary Python libraries for sensor integration, image processing, and camera capture. Some of the libraries we will use include OpenCV for image processing and NumPy for array operations.
Step 3: Programming the Autonomous Vehicle
The next step is to program the behavior of the autonomous vehicle. We will use Python to program the vehicle’s behavior based on sensor input and camera capture. For example, if an ultrasonic sensor detects an obstacle, the vehicle should stop or change its course. If the camera detects an object, the vehicle should recognize it and respond accordingly. We will also use the camera to monitor the vehicle’s behavior and capture video footage for analysis.
To program the behavior of the autonomous vehicle, we will use a combination of programming techniques such as computer vision, machine learning, and control theory. For example, we can use computer vision to detect objects in the vehicle’s surroundings, and machine learning to classify them as obstacles or non-obstacles. We can also use control theory to optimize the vehicle’s trajectory and ensure smooth movement.
Here is an example of code for obstacle detection using an ultrasonic sensor:
import RPi.GPIO as GPIO
import time

# Set up the ultrasonic sensor
TRIG = 23
ECHO = 24
GPIO.setup(TRIG,GPIO.OUT)
GPIO.setup(ECHO,GPIO.IN)
# Function to calculate distance
def distance():
    GPIO.output(TRIG, True)
    time.sleep(0.00001)
    GPIO.output(TRIG, False)
    pulse_start = time.time()
    pulse_end = time.time()
    while GPIO.input(ECHO)==0:
        pulse_start = time.time()
    while GPIO.input(ECHO)==1:
        pulse_end = time.time()
    pulse_duration = pulse_end - pulse_start
    distance = pulse_duration * 17150
    distance = round(distance, 2)
    return distance
# Main loop for obstacle detection
while True:
    dist = distance()
    print("Distance:", dist, "cm")
    if dist < 10:
        # Stop the vehicle
        print("Obstacle detected!")
    else:
        # Move the vehicle forward
        print("Moving forward.")
Step 4: Capturing and Analyzing Behavior with the Camera
In addition to obstacle detection and object recognition, we can use the camera to capture video footage of the vehicle’s behavior and analyze it to improve its performance. We can use image processing techniques such as object tracking, motion detection, and feature extraction to extract useful information from the video footage.
To capture and analyze the behavior of the autonomous vehicle with the camera, we can use OpenCV, a powerful library for computer vision and image processing. We can use OpenCV to capture video from the camera, extract features from the video frames, and track objects in the video.
Here is an example of code for capturing video from the camera and displaying it on the screen:
import cv2

# Set up the camera
cap = cv2.VideoCapture(0)
# Main loop for capturing video
while True:
    # Capture frame-by-frame
    ret, frame = cap.read()
    # Display the resulting frame
    cv2.imshow('frame',frame)
    if cv2.waitKey(1) & 0xFF == ord('q'):
        break
# Release the camera
cap.release()
cv2.destroyAllWindows()
Step 5: Testing the Autonomous Vehicle
Once the vehicle is programmed and the camera is set up, we need to test it to ensure it is functioning as expected. We can test the vehicle in a controlled environment with obstacles and objects to detect. We can also test the camera by capturing video footage and analyzing it to improve the vehicle’s performance.
To test the autonomous vehicle, we can use a variety of techniques such as unit testing, simulation, and real-world testing. Unit testing involves testing individual components of the system to ensure they are functioning correctly. Simulation involves using a virtual environment to test the behavior of the vehicle under different conditions. Real-world testing involves testing the vehicle in a real-world environment with actual obstacles and objects.
In this tutorial, we explored how to build an autonomous vehicle from an RC car using a Raspberry Pi or Arduino for processing. We used Python to program the vehicle’s behavior based on sensor input and camera capture, and we integrated sensors such as ultrasonic sensors and a camera to enable obstacle detection, object recognition, and behavior monitoring. With the knowledge gained from this tutorial, you can start exploring the exciting world of autonomous vehicles and contribute to the development of this rapidly growing field.
Please follow me, share and like this post!
Next Article: Part 2: Integrating Motor Drivers
Lyron Foster is a Hawai’i based African American Author, Musician, Actor, Blogger, Philanthropist and Multinational Serial Tech Entrepreneur.

