Date Archives

March 2023

Part 1: Turning an RC Car into an Autonomous Vehicle (1/5)
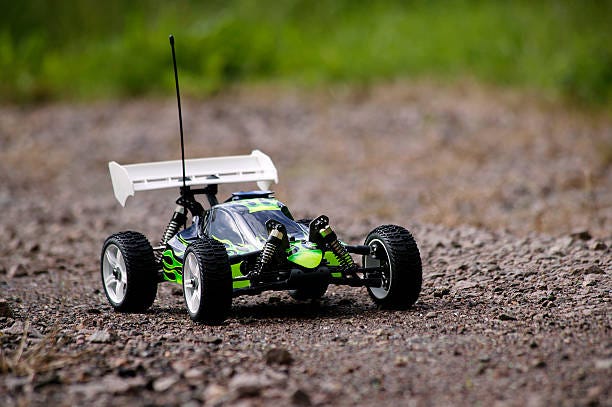
Part 1: Turning an RC Car into an Autonomous Vehicle (1/5)

Autonomous vehicles, also known as self-driving cars, have become increasingly popular in recent years due to their potential to improve transportation efficiency and reduce accidents. In this tutorial, we will explore how to build an autonomous vehicle from an RC car using a Raspberry Pi or Arduino for processing. We will use Python to program the vehicle’s behavior, and we will integrate sensors such as ultrasonic sensors and a camera to enable obstacle detection, object recognition, and behavior monitoring.

Step 1: Setting up the Hardware

The first step is to set up the hardware components of the autonomous vehicle. We will need an RC car, a Raspberry Pi or Arduino for processing, and sensors such as ultrasonic sensors and a camera. We will use the GPIO pins on the Raspberry Pi or Arduino to interface with the sensors and control the vehicle’s motors.

To set up the hardware, we will need to disassemble the RC car and remove the existing control circuitry. We will then connect the motor drivers and sensors to the Raspberry Pi or Arduino using jumper wires. We will also need to mount the camera on the vehicle and connect it to the Raspberry Pi or Arduino.

Step 2: Setting up the Software Environment

Once the hardware is set up, we need to set up the software environment. We will use the Raspbian or Arduino IDE to program the Raspberry Pi or Arduino. We will also need to install the necessary Python libraries for sensor integration, image processing, and camera capture. Some of the libraries we will use include OpenCV for image processing and NumPy for array operations.

Step 3: Programming the Autonomous Vehicle

The next step is to program the behavior of the autonomous vehicle. We will use Python to program the vehicle’s behavior based on sensor input and camera capture. For example, if an ultrasonic sensor detects an obstacle, the vehicle should stop or change its course. If the camera detects an object, the vehicle should recognize it and respond accordingly. We will also use the camera to monitor the vehicle’s behavior and capture video footage for analysis.

To program the behavior of the autonomous vehicle, we will use a combination of programming techniques such as computer vision, machine learning, and control theory. For example, we can use computer vision to detect objects in the vehicle’s surroundings, and machine learning to classify them as obstacles or non-obstacles. We can also use control theory to optimize the vehicle’s trajectory and ensure smooth movement.

Here is an example of code for obstacle detection using an ultrasonic sensor:

Step 4: Capturing and Analyzing Behavior with the Camera

In addition to obstacle detection and object recognition, we can use the camera to capture video footage of the vehicle’s behavior and analyze it to improve its performance. We can use image processing techniques such as object tracking, motion detection, and feature extraction to extract useful information from the video footage.

To capture and analyze the behavior of the autonomous vehicle with the camera, we can use OpenCV, a powerful library for computer vision and image processing. We can use OpenCV to capture video from the camera, extract features from the video frames, and track objects in the video.

Here is an example of code for capturing video from the camera and displaying it on the screen:

Step 5: Testing the Autonomous Vehicle

Once the vehicle is programmed and the camera is set up, we need to test it to ensure it is functioning as expected. We can test the vehicle in a controlled environment with obstacles and objects to detect. We can also test the camera by capturing video footage and analyzing it to improve the vehicle’s performance.

To test the autonomous vehicle, we can use a variety of techniques such as unit testing, simulation, and real-world testing. Unit testing involves testing individual components of the system to ensure they are functioning correctly. Simulation involves using a virtual environment to test the behavior of the vehicle under different conditions. Real-world testing involves testing the vehicle in a real-world environment with actual obstacles and objects.

In this tutorial, we explored how to build an autonomous vehicle from an RC car using a Raspberry Pi or Arduino for processing. We used Python to program the vehicle’s behavior based on sensor input and camera capture, and we integrated sensors such as ultrasonic sensors and a camera to enable obstacle detection, object recognition, and behavior monitoring. With the knowledge gained from this tutorial, you can start exploring the exciting world of autonomous vehicles and contribute to the development of this rapidly growing field.

Please follow me, share and like this post!

Next Article: Part 2: Integrating Motor Drivers

Election Season is Coming: A guide to social media manipulation with Python.

Election Season is Coming: A guide to social media manipulation with Python.

Disclaimer: The purpose of this article is to provide a tutorial on how to use Python and machine learning techniques to analyze social media posts and generate responses that promote a product or political candidate. However, I do not endorse or condone any form of political manipulation or unethical behavior. It is important to note that this script has a variety of legitimate and ethical uses, such as improving customer engagement and understanding audience sentiment. It is the responsibility of the user to ensure that the tool is used in an ethical and responsible manner.

Social media analysis is an important task in the world of marketing and politics. Analyzing social media posts and creating responses to promote a product or political candidate is an example of how machine learning technology can be used to enhance marketing efforts. In this tutorial, we will explore how to use Python and machine learning techniques to analyze social media posts and create responses that promote a product or political candidate.

Step 1: Data Collection

The first step is to collect data from social media platforms. We will be using the Twitter API to collect data from tweets. To do this, you will need to create a Twitter Developer account and obtain your API keys. Once you have your API keys, you can use Python libraries like tweepy to collect data from Twitter.

Step 2: Data Preprocessing

Next, we need to preprocess the data we collected. This involves cleaning and transforming the data so that it can be used in machine learning models. We will use Python libraries like pandas and nltk to preprocess the data.

Step 3: Feature Extraction

Now that the data is preprocessed, we need to extract features from the text that we can use in our machine learning models. We will use Python libraries like scikit-learn to extract features like word frequency and TF-IDF.

Step 4: Model Training

With the features extracted, we can now train our machine learning model. We will be using a classification model to classify the tweets into categories like positive, negative, or neutral. We will use Python libraries like scikit-learn to train the model.

Step 5: Generating Responses

Now that we have trained our machine learning model, we can use it to generate responses to social media posts. We will use Python to preprocess the incoming social media posts, extract features, and classify the posts using our trained model. We will then generate a response based on the classification.

In this tutorial, we explore how to use Python and machine learning to analyze social media posts and generate responses that promote a product or political candidate. We use the Twitter API to collect tweet data, preprocess the data using Python libraries such as pandas and nltk, extract features using scikit-learn, and train a machine learning model using Multinomial Naive Bayes. We then use the trained model to generate responses based on the incoming social media posts.

The ability to analyze social media posts and generate responses can have a significant impact on marketing and political campaigns. By using machine learning techniques, we can improve the effectiveness of these efforts and better understand the sentiments of our target audience.

Reconocimiento de las emociones humanas con IA. (TensorFlow, Keras, OpenCV) (en español)

Reconocimiento de las emociones humanas con IA. (TensorFlow, Keras, OpenCV) (en español)

La detección de emociones es una tarea de aprendizaje automático que consiste en detectar y clasificar las emociones expresadas por los humanos a través del habla, las expresiones faciales y otras formas de comunicación no verbal. La detección de emociones tiene aplicaciones en campos como la psicología, el marketing y la interacción hombre-computadora. En este tutorial, exploraremos cómo construir un sistema de detección de emociones utilizando Python y aprendizaje automático.

Paso 1: Instalación de las bibliotecas requeridas

El primer paso es instalar las bibliotecas requeridas. Utilizaremos las bibliotecas TensorFlow y Keras para el aprendizaje automático, así como OpenCV para la visión por computadora.

Paso 2: Preprocesamiento de datos

El siguiente paso es preprocesar los datos. Utilizaremos un conjunto de datos de imágenes faciales con emociones correspondientes para entrenar el sistema de detección de emociones. Utilizaremos OpenCV para cargar y preprocesar las imágenes.

Paso 3: Creación de datos de entrenamiento

A continuación, necesitamos crear los datos de entrenamiento para el sistema de detección de emociones. Utilizaremos una técnica llamada transfer learning, que implica utilizar un modelo pre-entrenado como punto de partida para entrenar nuestro propio modelo.

Paso 4: Entrenamiento del modelo

Ahora, podemos entrenar el modelo utilizando los datos de entrenamiento que creamos anteriormente.

Paso 5: Prueba del modelo

Finalmente, podemos probar el modelo proporcionándole una nueva imagen y teniendo el modelo predecir la emoción correspondiente.

En este tutorial, exploramos cómo construir un sistema de detección de emociones utilizando Python y aprendizaje automático. Utilizamos OpenCV para el preprocesamiento de imágenes, TensorFlow y Keras para el aprendizaje automático y transfer learning para crear un modelo que pueda reconocer emociones expresadas en imágenes faciales. La detección de emociones tiene una amplia gama de aplicaciones, incluyendo mejorar el servicio al cliente, mejorar la interacción humano-computadora y ayudar a las personas a comprender y gestionar mejor sus emociones. Al utilizar el aprendizaje automático, podemos construir sistemas de detección de emociones más precisos y efectivos que se pueden aplicar en una variedad de contextos.

Una limitación de este tutorial es que nos enfocamos solo en la detección de emociones faciales y no en otras modalidades como el habla o el texto. Sin embargo, las técnicas utilizadas aquí también se pueden aplicar a otras formas de detección de emociones.

En conclusión, la construcción de un sistema de detección de emociones puede ser un proyecto gratificante para cualquier persona interesada en el aprendizaje automático y sus aplicaciones en la psicología y el comportamiento humano. Siguiendo los pasos de este tutorial, puede crear su propio sistema de detección de emociones y explorar las posibilidades de este emocionante campo.

Recognizing human emotions with AI. (TensorFlow, Keras, OpenCV)

Recognizing human emotions with AI. (TensorFlow, Keras, OpenCV)

Emotion recognition is a machine learning task that involves detecting and classifying emotions expressed by humans through speech, facial expressions, and other forms of non-verbal communication. Emotion recognition has applications in fields such as psychology, marketing, and human-computer interaction. In this tutorial, we will explore how to build an emotion recognition system using Python and machine learning.

Step 1: Installing the required libraries

The first step is to install the required libraries. We will be using the TensorFlow and Keras libraries for machine learning, as well as OpenCV for computer vision.

pip install tensorflow keras opencv-python-headless

Step 2: Preprocessing the data

The next step is to preprocess the data. We will be using a dataset of facial images with corresponding emotions for training the emotion recognition system. We will use OpenCV to load and preprocess the images.

import cv2
import numpy as np
import pandas as pd

# Load the data
data = pd.read_csv('emotion_labels.csv')
# Load the images
images = []
for image_path in data['image_path']:
    image = cv2.imread(image_path, 0)
    image = cv2.resize(image, (48, 48))
    images.append(image)
# Convert the images to numpy arrays
images = np.array(images)

Step 3: Creating training data

Next, we need to create the training data for the emotion recognition system. We will use a technique called transfer learning, which involves using a pre-trained model as a starting point for training our own model.

from keras.applications import VGG16
from keras.models import Model
from keras.layers import Dense, Flatten

# Load the pre-trained model
base_model = VGG16(weights='imagenet', include_top=False, input_shape=(48, 48, 3))
# Add new layers to the model
x = base_model.output
x = Flatten()(x)
x = Dense(1024, activation='relu')(x)
predictions = Dense(7, activation='softmax')(x)
# Define the new model
model = Model(inputs=base_model.input, outputs=predictions)
# Freeze the layers in the pre-trained model
for layer in base_model.layers:
    layer.trainable = False
# Compile the model
model.compile(loss='categorical_crossentropy', optimizer='adam', metrics=['accuracy'])

Step 4: Training the model

Now, we can train the model using the training data we created earlier.

from keras.utils import to_categorical

# Convert the labels to one-hot encoding
labels = to_categorical(data['label'], num_classes=7)
# Train the model
model.fit(images, labels, epochs=10, batch_size=32)

Step 5: Testing the model

Finally, we can test the model by providing it with a new image and having it predict the corresponding emotion.

# Load a test image
test_image = cv2.imread('test_image.jpg', 0)
test_image = cv2.resize(test_image, (48, 48))
# Convert the test image to a numpy array
test_image = np.array([test_image])# Predict the emotion in the test image
prediction = model.predict(test_image)[0]
emotion = np.argmax(prediction)# Print the predicted emotion
emotions = ['Angry', 'Disgust', 'Fear', 'Happy', 'Neutral', 'Sad', 'Surprise']
print('Predicted emotion:', emotions[emotion])

In this tutorial, we explored how to build an emotion recognition system using Python and machine learning. We used OpenCV for image preprocessing, TensorFlow and Keras for machine learning modeling, and transfer learning to create a model that can recognize emotions expressed in facial images. Emotion recognition has a wide range of applications, including improving customer service, enhancing human-computer interaction, and helping individuals better understand and manage their emotions. By using machine learning, we can build more accurate and effective emotion recognition systems that can be applied in a variety of contexts.

One limitation of this tutorial is that we only focused on facial image recognition, and not other modalities such as speech or text. However, the techniques used here can be applied to other forms of emotion recognition as well.

In conclusion, building an emotion recognition system can be a rewarding project for anyone interested in machine learning and its applications in human psychology and behavior. By following the steps in this tutorial, you can create your own emotion recognition system and explore the possibilities of this exciting field.

Creando Chatbots con Aprendizaje Automático en Python (NTLK, TensorFlow, Keras) (en español)

Creando Chatbots con Aprendizaje Automático en Python (NTLK, TensorFlow, Keras) (en español)

Los chatbots se están convirtiendo cada vez más populares como una forma para que las empresas interactúen con sus clientes y brinden soporte personalizado al cliente. Un chatbot es un programa de computadora que utiliza procesamiento de lenguaje natural y aprendizaje automático para simular una conversación con usuarios humanos. En este tutorial, exploraremos cómo crear un chatbot simple utilizando Python y aprendizaje automático.

Paso 1: Instalación de las bibliotecas requeridas

El primer paso es instalar las bibliotecas requeridas. Utilizaremos la biblioteca Natural Language Toolkit (NLTK) para procesamiento de lenguaje natural, así como las bibliotecas TensorFlow y Keras para aprendizaje automático.

Paso 2: Preprocesamiento de datos

El siguiente paso es preprocesar los datos. Utilizaremos un conjunto de datos de diálogos de películas para entrenar el chatbot. Usaremos NLTK para tokenizar el texto y convertirlo a minúsculas.

Paso 3: Creación de datos de entrenamiento

A continuación, necesitamos crear los datos de entrenamiento para el chatbot. Utilizaremos una técnica llamada aprendizaje de secuencia a secuencia, que implica mapear una secuencia de tokens de entrada a una secuencia de tokens de salida.

Paso 4: Construcción del modelo

Ahora, podemos construir el modelo de aprendizaje automático para el chatbot utilizando Keras. Usaremos una red neuronal recurrente (RNN) simple con una sola capa LSTM.

Paso 5: Entrenamiento del modelo

A continuación, podemos entrenar el modelo utilizando los datos de entrenamiento que creamos anteriormente.

Paso 6: Generación de respuestas

Finalmente, podemos utilizar el modelo entrenado para generar respuestas a la entrada del usuario. Podemos hacer esto convirtiendo primero la entrada del usuario en una secuencia de tokens utilizando NLTK y luego utilizando el modelo para predecir el siguiente token en secuencia.

En este tutorial, exploramos cómo crear un chatbot simple utilizando Python y aprendizaje automático. Utilizamos NLTK para procesamiento de lenguaje natural, TensorFlow y Keras para aprendizaje automático, y un conjunto de datos de diálogos de películas para entrenar el chatbot. Los chatbots pueden utilizarse en una variedad de aplicaciones, como servicio al cliente, comercio electrónico y redes sociales. Al utilizar el aprendizaje automático, los chatbots pueden aprender de sus interacciones con los usuarios y mejorar su rendimiento con el tiempo.

Creating a Chatbot with Machine Learning in Python (NLTK, TensorFlow, Keras)

Creating a Chatbot with Machine Learning in Python (NLTK, TensorFlow, Keras)

Chatbots are becoming increasingly popular as a way for businesses to engage with their customers and provide personalized customer support. A chatbot is a computer program that uses natural language processing and machine learning to simulate conversation with human users. In this tutorial, we will explore how to create a simple chatbot using Python and machine learning.

Step 1: Installing the required libraries

The first step is to install the required libraries. We will be using the Natural Language Toolkit (NLTK) library for natural language processing, as well as the TensorFlow and Keras libraries for machine learning.

Step 2: Preprocessing the data

The next step is to preprocess the data. We will be using a dataset of movie dialogues for training the chatbot. We will use NLTK to tokenize the text and convert it to lowercase.

Step 3: Creating training data

Next, we need to create the training data for the chatbot. We will use a technique called sequence-to-sequence learning, which involves mapping a sequence of input tokens to a sequence of output tokens.

Step 4: Building the model

Now, we can build the machine learning model for the chatbot using Keras. We will use a simple recurrent neural network (RNN) with a single LSTM layer.

# Define the model architecture
model = Sequential()
model.add(Embedding(input_dim=len(tokens), output_dim=100, input_length=1))
model.add(LSTM(256))
model.add(Dense(len(tokens), activation='softmax'))# Compile the model
model.compile(loss='categorical_crossentropy', optimizer='adam', metrics=['accuracy'])

Step 5: Training the model

Next, we can train the model using the training data we created earlier.

Step 6: Generating responses

Finally, we can use the trained model to generate responses to user input. We can do this by first converting the user input to a sequence of tokens using NLTK, and then using the model to predict the next token in the sequence.

In this tutorial, we explore how to build a simple chatbot using Python and machine learning. We use NLTK for natural language processing, TensorFlow and Keras for machine learning, and a dataset of movie dialogues to train the chatbot. Chatbots can be used in a variety of applications, such as customer service, e-commerce, and social media. By using machine learning, chatbots can learn from their interactions with users and improve their performance over time.

Fraud Detection with Machine Learning using Python (numpy, pandas, matplotlib, and scikit-learn)

Fraud Detection with Machine Learning using Python (numpy, pandas, matplotlib, and scikit-learn)

Fraud is a pervasive problem in many industries, including finance, insurance, and social media. With the increasing availability of data and the advancement of machine learning algorithms, it has become possible to leverage these tools to detect fraudulent activity more effectively.

In this post, I’ll explore how machine learning can be used for fraud detection. I’ll going to create a tutorial demonstrating how to implement a fraud detection model using Python.

I’ll discuss the key concepts and techniques involved in fraud detection with machine learning, such as preprocessing the data, selecting an appropriate machine learning algorithm, and evaluating the performance of the model.

Sounds cool, right? Let’s dive in!

Step 1. Import the required libraries:

First, you need to import the required libraries, including numpy, pandas, matplotlib, and scikit-learn.

Step 2. Load the data:

Next, you need to load the data that you will use for fraud detection. You can use a publicly available dataset such as the Credit Card Fraud Detection dataset from Kaggle.

Step 3. Explore the data:

Once the data is loaded, you need to explore it to gain a better understanding of its features and distributions.

Step 4. Preprocess the data:

Once you have explored the data, you need to preprocess it so that it can be used for training the machine learning model. This involves tasks such as feature engineering, normalization, and splitting the data into training and validation sets.

In this preprocessing example, we first remove the  column from the dataset as it is not useful for classification. We then normalize the  column using , which scales the data to have a mean of 0 and a standard deviation of 1. This is an important preprocessing step as it ensures that all the features have similar scales, which can help improve the performance of the machine learning model.

Next, we split the data into features () and labels (). The  dataframe contains all the columns except the  column, which is the target variable we are trying to predict. The  dataframe contains only the  column.

Finally, we split the data into training and validation sets using  from scikit-learn. We use a test size of 0.2, which means that 20% of the data is used for validation. We also use stratified sampling to ensure that the proportion of fraudulent and non-fraudulent transactions is the same in both the training and validation sets. This is important as it ensures that the machine learning model is trained on a representative sample of the data.

Step 5. Define the model:

Once the data is preprocessed, you need to define the architecture of the machine learning model. For this example, we will use a random forest classifier.

Step 6. Train the model:

Once the model is defined, you need to train it using the preprocessed data.

Step 7. Evaluate the model:

After training the model, you need to evaluate its performance on the validation set.

Step 8. Test the model:

Once you are satisfied with the model’s performance on the validation set, you can test it on a new set of data to see how well it generalizes to unseen data.

In this testing example, we first load the new data from a CSV file using . We then preprocess the new data by dropping the  column and normalizing the  column using the same  object that we used for the training data.

Next, we split the new data into features () and labels (). We then use the  method to make predictions on the new data. Finally, we evaluate the performance of the model on the new data using  from scikit-learn. This method prints a report that includes metrics such as precision, recall, and F1-score for both the fraudulent and non-fraudulent classes.

This allows us to get a better sense of how well it generalizes to unseen data and how effective it is at detecting fraudulent activity in real-world scenarios.

That’s it! This basic basic example should give you an idea of how to use machine learning for fraud detection using Python.

Financial Forecasting with Machine Learning using Python (Numpy, Pandas, Matplotlib and Scikit-learn)

Financial Forecasting with Machine Learning using Python (Numpy, Pandas, Matplotlib and Scikit-learn)

In this tutorial, we will explore how machine learning can be used for financial forecasting using Python. We will begin by loading financial data from an API and preprocessing it for machine learning, which includes normalization and splitting the data into training and validation sets.

Then, we will define a machine learning model using an LSTM-based neural network architecture and train it on the preprocessed data. After evaluating the model’s performance on the validation set, we will use it to make predictions on new data.

Sounds cool, right?

Alright let’s go!

Step 1. Import the required libraries:

First, you need to import the required libraries, including numpy, pandas, matplotlib, and scikit-learn.

Step 2. Load the data:

Next, you need to load the financial data that you will use for forecasting. You can use a financial data API such as Alpha Vantage to load the stock market data for the company of interest.

Step 3. Preprocess the data:

Once the data is loaded, you need to preprocess it so that it can be used for training the machine learning model. This involves tasks such as feature engineering, normalization, and splitting the data into training and validation sets.

Step 4. Define the model:

Once the data is preprocessed, you need to define the architecture of the machine learning model. For this example, we will use a recurrent neural network (RNN) with LSTM cells.

Step 5. Train the model:

Once the model is defined, you need to train it using the preprocessed dat

Step 6. Evaluate the model:

After training the model, you need to evaluate its performance on the validation set.

Step 7. Visualize the results:

Once the model is trained and evaluated, you can visualize the results to see how well the model is able to forecast the financial data.

Step 8. Make predictions:

Once you are satisfied with the model’s performance on the validation set, you can use it to make predictions on new data.

This example should give you an idea of how to use machine learning for financial forecasting using Python. With some domain knowledge and creativity, you can use machine learning for a variety of financial forecasting tasks, including predicting stock prices, market trends, and other financial indicators.

If you found this article interesting, then you might find the book: Algorithmic Trading by Lyron Foster a good read.

Speech Recognition with TensorFlow and Keras Libraries in Python. (Yes, like Siri and Alexa)

Speech Recognition with TensorFlow and Keras Libraries in Python. (Yes, like Siri and Alexa)

Speech recognition models have a wide range of practical applications. One of the most common uses is in virtual assistants, such as Apple’s Siri, Amazon’s Alexa, and Google Assistant. These virtual assistants use speech recognition models to understand and respond to user commands and queries. In addition, speech recognition models are used in call center operations to transcribe customer service calls, in dictation software to transcribe spoken words into text, and in language learning apps to help learners practice their pronunciation. Moreover, speech recognition models are increasingly used in the healthcare industry, where they can be used to transcribe medical notes and patient information, reducing the burden on healthcare professionals and improving patient care.

Sounds pretty cool, right? Here’s how you can get started building one.

Step1. Install the required libraries:

First, you need to install TensorFlow and Keras libraries in Python. You can install them using pip command in the terminal.

Step 2. Import the required libraries:

Once the libraries are installed, you need to import them in your Python script.

Step 3. Load the dataset:

Next, you need to load a dataset of audio recordings and their corresponding transcriptions that you will use to train your model. For this example, we will use the Mozilla Common Voice dataset, which contains thousands of hours of speech data in multiple languages.

Step 4. Define the model:

Once the data is preprocessed, you need to define the architecture of the model. For this example, we will use a recurrent neural network (RNN) with LSTM cells

Step 5. Train the model:

Once the model is defined, you need to train it using the preprocessed data.

Step 6. Evaluate the model:

After training the model, you need to evaluate its performance on the validation set.

Step 7. Test the model:

Once you are satisfied with the model’s performance on the validation set, you can test it on a new set of audio recordings to see how well it generalizes to unseen data.

Step 8. Save the model:

If you want to use the model in a real-world application, you can save it as a file.

Speech recognition models have the potential to improve the efficiency and accuracy of a wide range of tasks, and can be a powerful tool for automating repetitive and time-consuming tasks. You can learn more about Machine Learning and A.I. by checking out my book: A.I. & Machine Learning by Lyron Foster.

Building an Image Recognition Model using TensorFlow and Keras Libraries in Python

Building an Image Recognition Model using TensorFlow and Keras Libraries in Python

Image recognition models are extremely useful in a wide range of applications, from autonomous vehicles and medical diagnosis to social media analysis and e-commerce. By teaching a computer to identify and classify images based on certain features, such as color, shape, and texture, we can automate tasks that would be difficult or impossible for humans to do at scale. For example, an image recognition model can be used to detect objects in images, recognize faces and emotions, identify text in images, and even diagnose medical conditions based on medical images. In e-commerce, image recognition models can be used to recommend products based on visual similarity, allowing for more personalized and relevant product recommendations.

Pretty cool, right? Let’s give it a try…

Step 1. Install the required libraries:

First, you need to install TensorFlow and Keras libraries in Python. You can install them using pip command in the terminal.

Step 2. Import the required libraries:

Once the libraries are installed, you need to import them in your Python script.

Step 3. Load the dataset:

Next, you need to load a dataset of images that you will use to train your model. For this example, we will use the CIFAR-10 dataset, which contains 60,000 32×32 color images in 10 classes. You can load the dataset using the load_data() function from keras.datasets module.

Step 4. Preprocess the data:

Once the dataset is loaded, you need to preprocess the data so that it can be used for training. This involves tasks such as resizing the images to a consistent size, normalizing the pixel values, and splitting the data into training and validation sets.

Step 5. Define the model:

Once the data is preprocessed, you need to define the architecture of the model. For this example, we will use a pre-trained ResNet50V2 model from Keras, which has been trained on the ImageNet dataset.

Step 6. Train the model:

Once the model is defined, you need to train it using the preprocessed data.

Step 7. Evaluate the model:

After training the model, you need to evaluate its performance on the validation set.

Step 8. Test the model:

Once you are satisfied with the model’s performance on the validation set, you can test it on a new set of images to see how well it generalizes to unseen data.

Step 9. Save the model:

If you want to use the model in a real-world application, you can save it as a file.

Super cool, right? Image recognition models have the potential to revolutionize many industries and improve the efficiency and accuracy of a wide range of tasks. If you want to learn more, check out the book: A.I. & Machine Learning by Lyron Foster.